GCash Payment
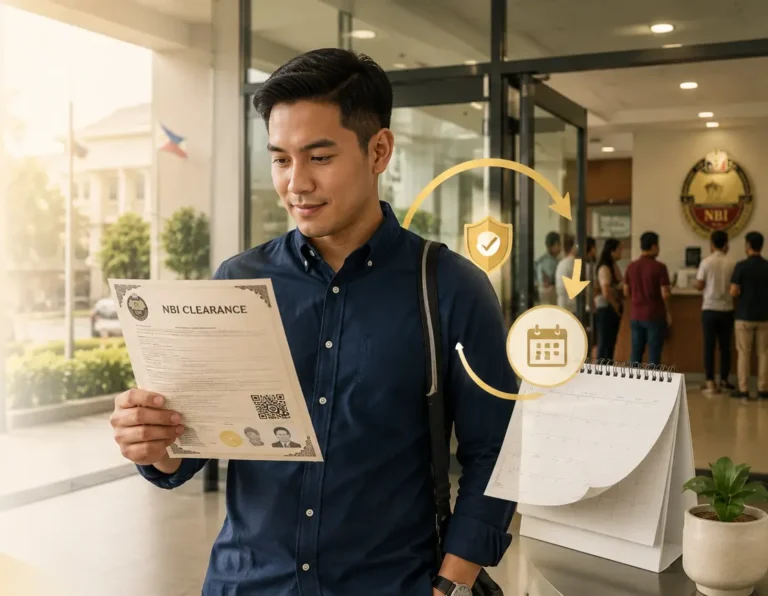
NBI Clearance
Pay your NBI Clearance fee quickly and securely
using GCash with this step-by-step guide.
GCash Payment NBI Clearance: Step-by-Step Guide
GCash payment for NBI Clearance is useful for applicants who want to pay online without visiting a payment center. You can use your NBI reference number to complete the payment through the GCash app, then go to your NBI appointment once the payment is posted. The process is simple, but mistakes in the reference number or amount can cause delays. This guide explains how to pay NBI Clearance using GCash and what to do if your payment does not reflect.
If you are applying as a first-time job seeker, check the First Time Job Seeker guide to see if you qualify for the fee exemption program.
Quick checklist:
Quick Answer
To pay NBI Clearance using GCash, first complete your NBI online application and generate a reference number. Open the GCash app, go to Bills or Pay Bills, choose Government, select NBI or NBI Clearance, enter the reference number, amount, and contact details, then confirm the payment. Save the GCash receipt or transaction confirmation after paying. Before going to your appointment, check your NBI account to see if the transaction status is already paid.
What You Need Before Paying
Through GCash
You need to finish the NBI online application before opening GCash. The reference number is created only after you complete your profile, choose your purpose, select an appointment branch, and generate a payment transaction. Do not guess the amount or reference number because GCash will use those details to match your payment. One wrong digit can make your payment harder to trace.
Before making your payment through GCash, make sure you have reviewed the NBI clearance requirements to avoid delays in your application.
Prepare these before paying:
How to Pay NBI Clearance Using
GCash
Paying your NBI Clearance through GCash is one of the fastest payment methods available. Once you receive your NBI reference number from the NBI Clearance portal, you can complete the payment directly from the GCash app without visiting a payment center. Follow the steps below to ensure your payment is processed successfully.
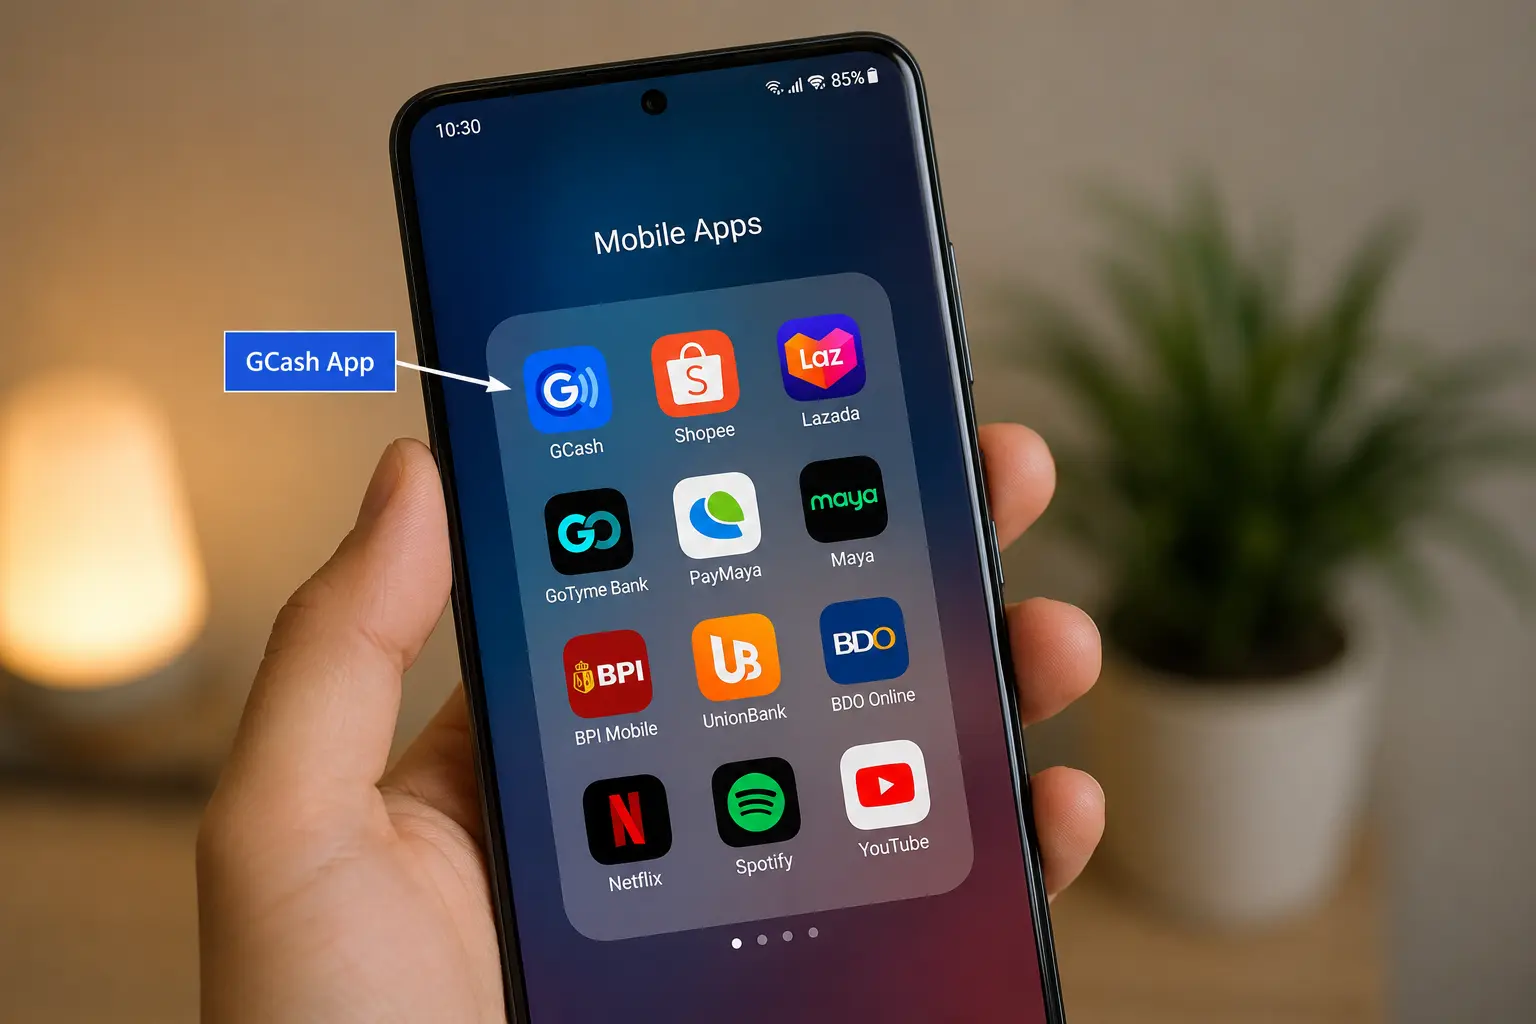
Step 1: Open the GCash App
Launch the GCash app on your mobile device and log in to your account using your registered mobile number and MPIN. Before proceeding, make sure your GCash wallet has enough balance to cover the NBI Clearance fee and any applicable service charges.
Wait for the app to load completely before moving to the next step.
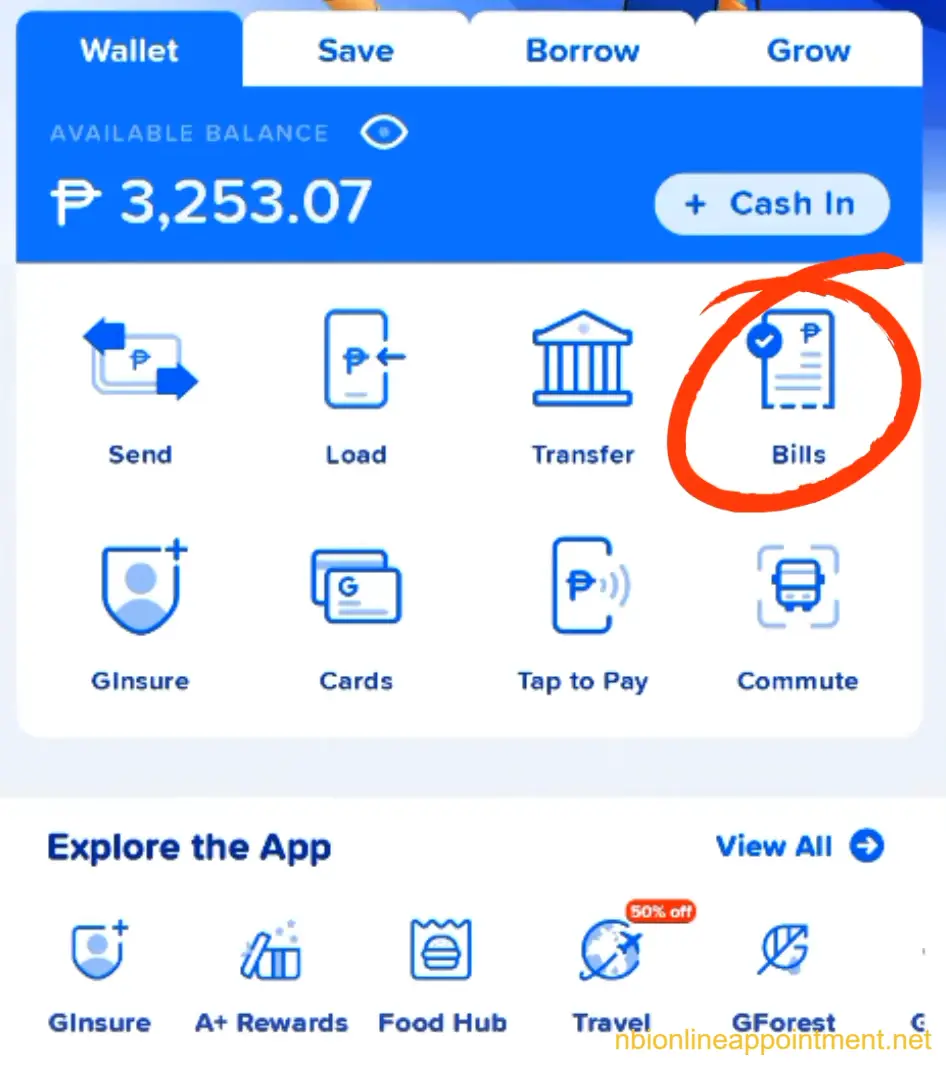
Step 2: Go to Bills and Payments
From the GCash home screen, tap the Bills or Pay Bills option. This section allows you to pay government fees, utilities, loans, and other services directly through the app.
The location of this option may vary slightly depending on the version of the GCash app, but it is usually displayed on the main dashboard.
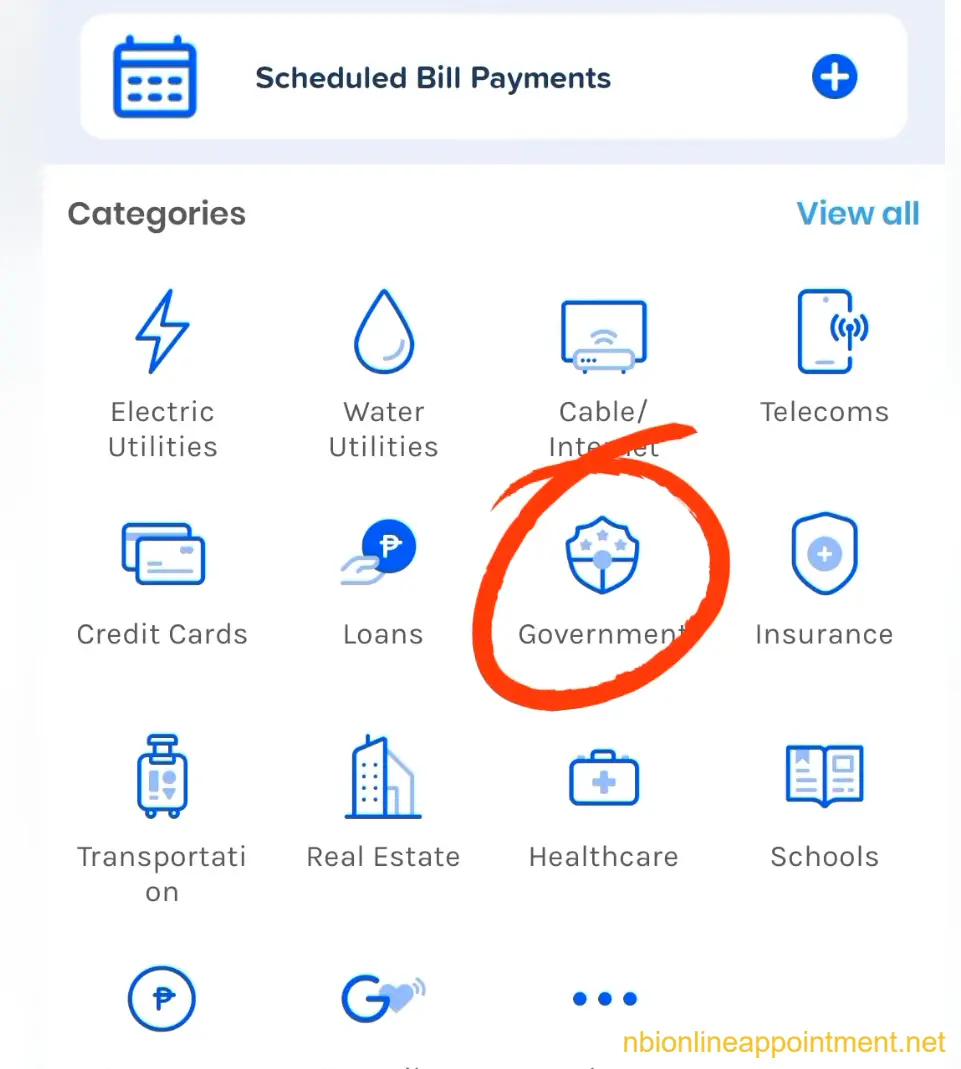
Step 3: Select the Government Category
Inside the Bills Payment section, browse the available biller categories and select Government. This category contains government agencies and services that accept payments through GCash.
Choosing the correct category helps you quickly locate the NBI biller and avoid sending payment to the wrong organization.
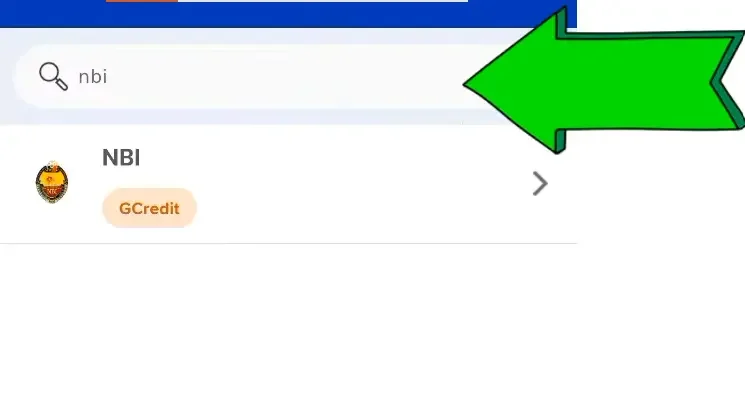
Step 4: Search for NBI
Use the search bar at the top of the Government billers page and type NBI. When the NBI payment option appears, tap it to open the payment form.
Make sure you select the official NBI biller shown in the app before entering any payment information.
Step 5: Enter Your Payment Details
The payment form will ask for information associated with your NBI transaction. Enter the details exactly as they appear in your NBI Clearance application to avoid payment verification issues.
You will typically need to provide:
Double-check every field before continuing. Incorrect information may delay payment confirmation.
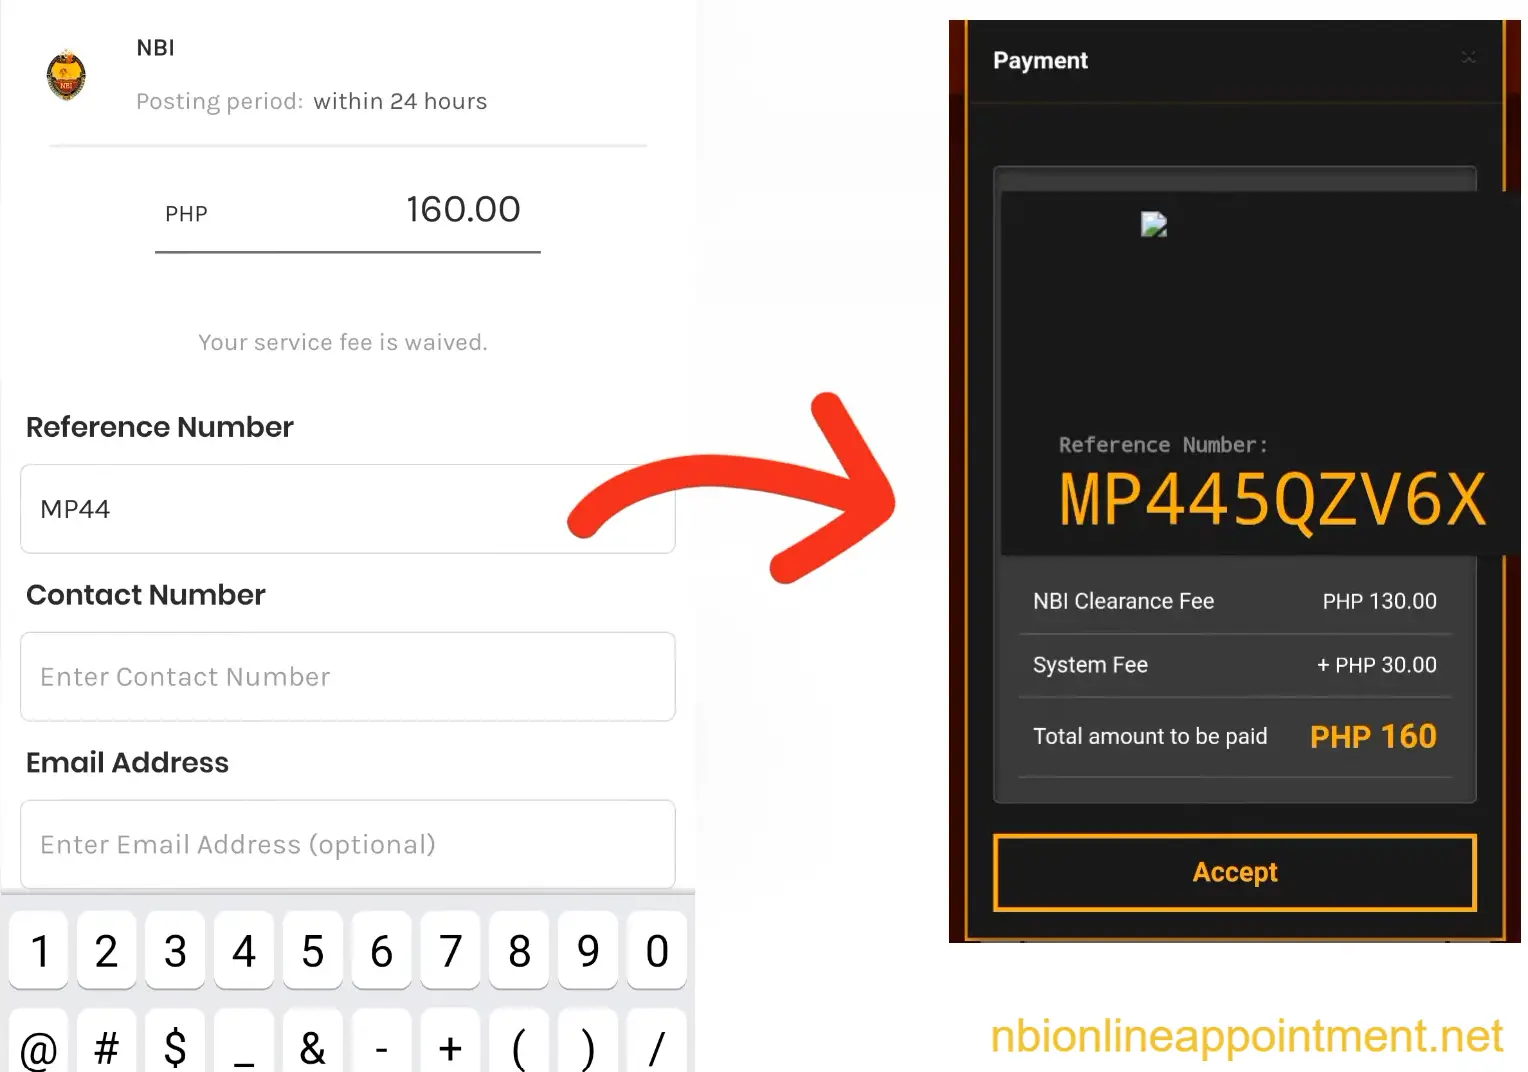
Step 6: Review and Confirm the
Payment
After entering all required details, review the payment summary displayed on the screen. Verify the reference number, payment amount, and contact information before proceeding.
If everything is correct, tap the Confirm or Pay button to submit your payment. Once submitted, the transaction will be processed through GCash.
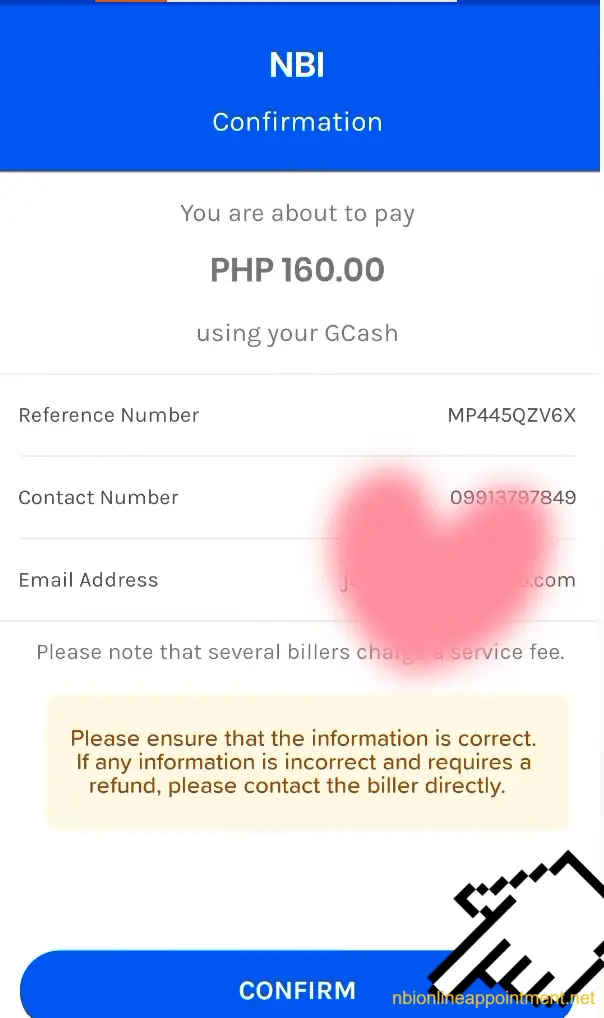
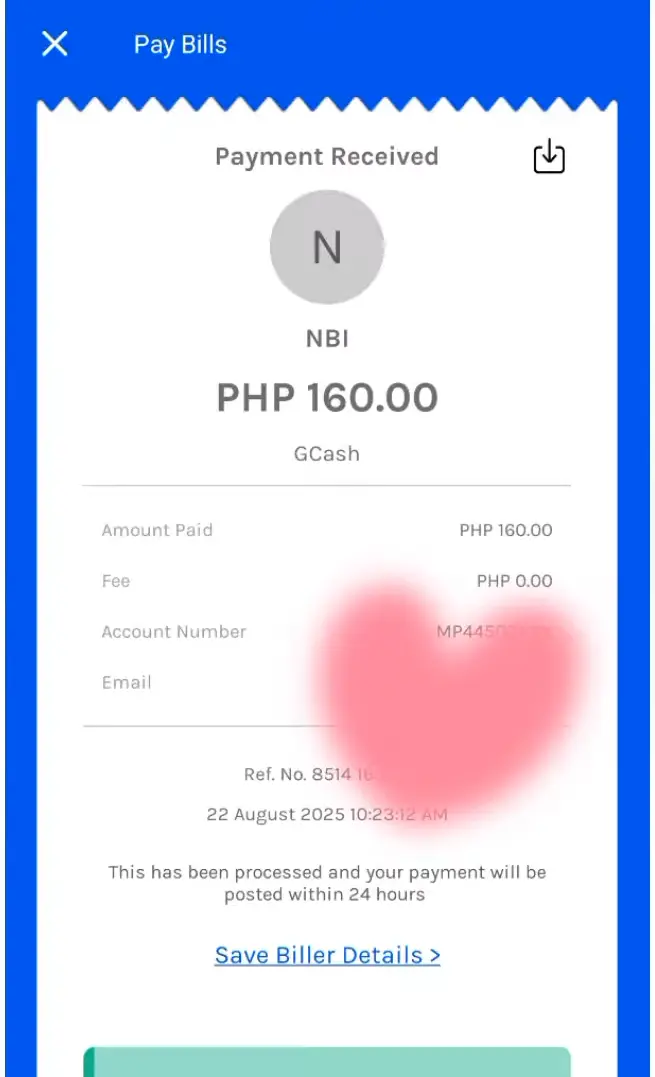
Step 7: Save the Payment Receipt
After a successful transaction, GCash will display a payment confirmation screen containing important transaction details. This receipt serves as proof that your NBI Clearance payment was completed.
Take a screenshot of the receipt and save the transaction record. It is also a good idea to keep a copy in your email or phone gallery for future reference.
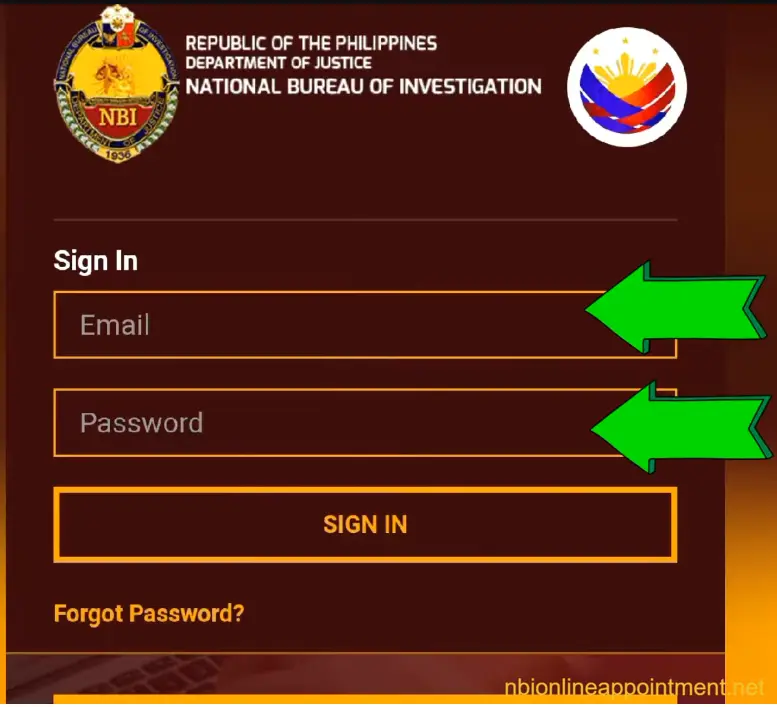
Step 8: Log In to the NBI Clearance
Portal
Once the payment has been completed, return to the NBI Clearance website and sign in to your account. Access the transaction section where your application and payment records are displayed.
Payment updates may appear immediately or take some time depending on system processing.
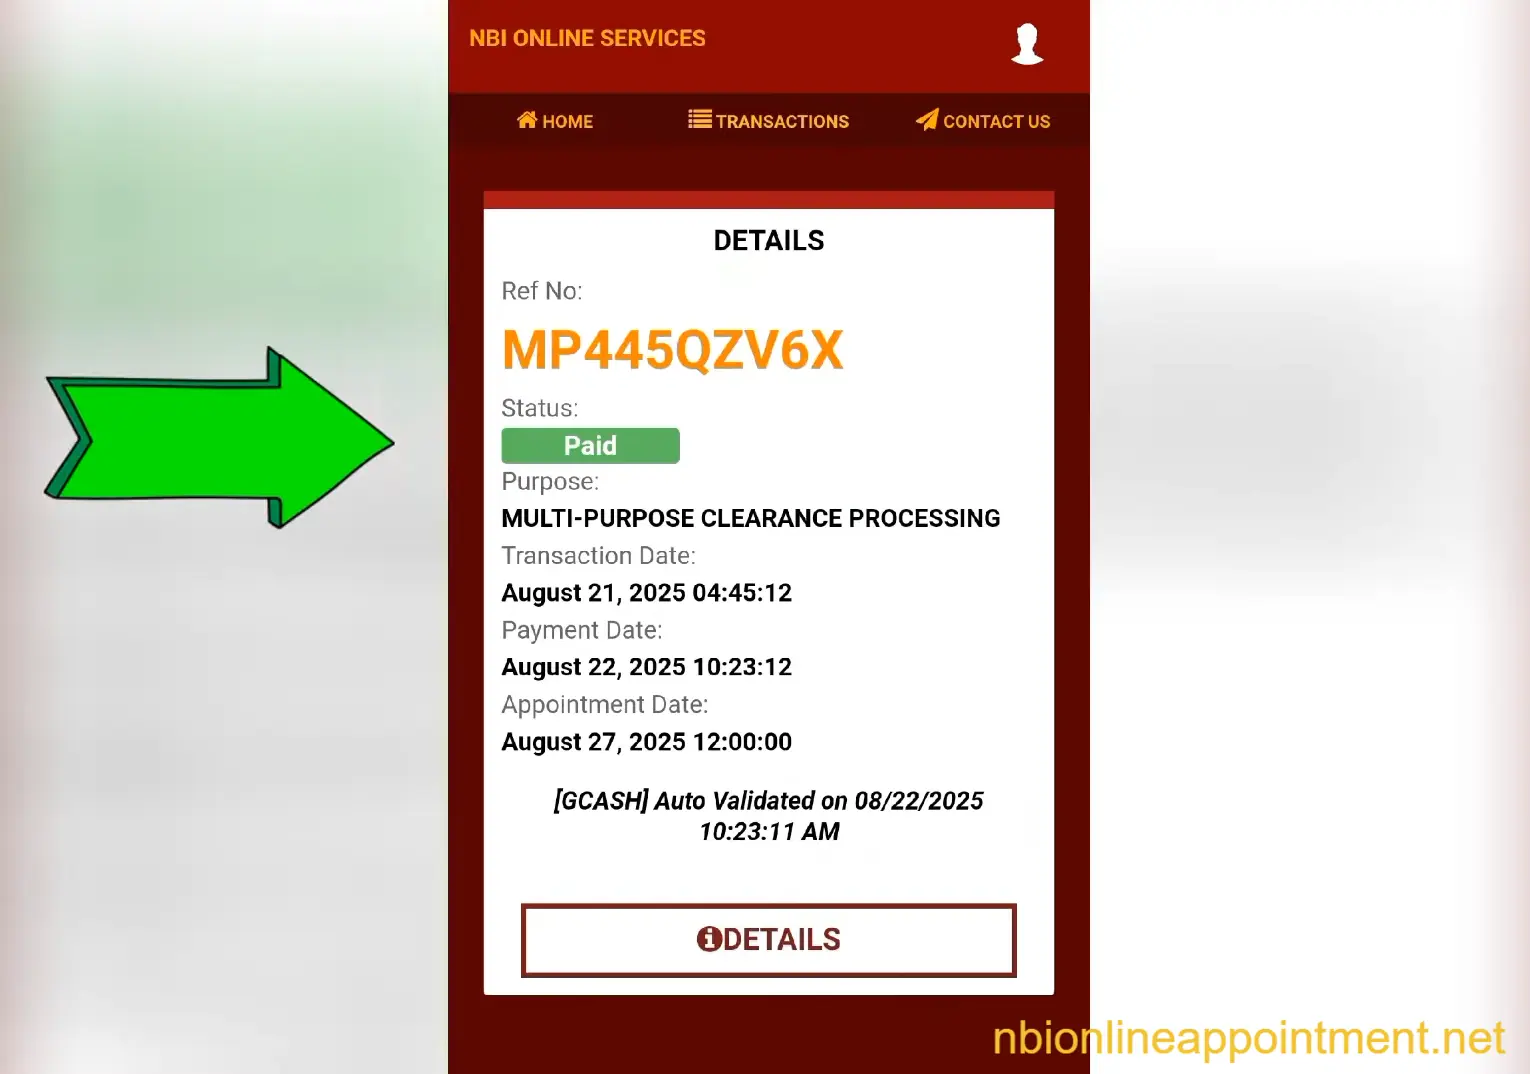
Step 9: Check Your Transaction Status
Open your NBI transaction details and verify that the payment status has been updated successfully. A completed payment should normally show a status indicating that the transaction has been paid or confirmed.
If the payment has not yet been reflected, wait for the system to process the transaction and avoid creating another payment request. Keep your GCash receipt until your NBI Clearance application is fully completed.
How Much Is NBI Clearance in GCash?
The basic NBI Clearance fee is ₱130, but the final amount through GCash may include a convenience fee or service charge. The exact total can change depending on the payment channel shown in the NBI portal or GCash app. Do not rely only on old online guides because fees and app screens can change. Always pay the amount shown in your current transaction.
Possible payment components:
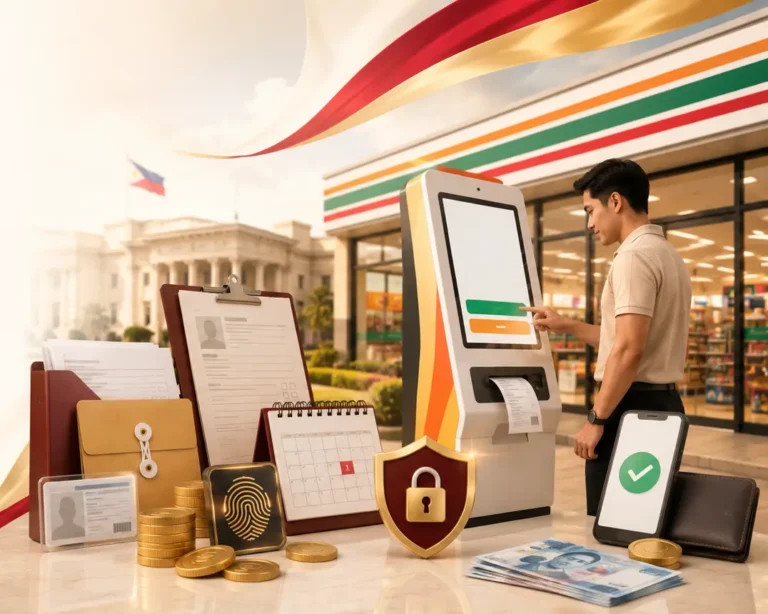
Bring or load extra balance in your GCash wallet before paying. If the amount displayed is very different from what you expected, stop and review the biller and reference number. Paying the wrong amount or wrong reference number may cause payment posting issues. When unsure, check your NBI transaction page before confirming payment. If you don’t have GCash, you can also choose 7-Eleven for NBI Payment.
How to Confirm If Your GCash
Payment Was Successful
A successful payment usually appears in your GCash transaction history and may also generate a receipt or confirmation message. The more important check is your NBI Clearance online account. If the payment has been posted correctly, the transaction should no longer appear as unpaid or pending. Some payments reflect quickly, while others may take longer because of system posting.
Check these after payment:
Do not pay again immediately if your wallet was deducted but the NBI account still shows pending. Wait for posting and keep proof of payment. If the status still does not update, use your GCash receipt and NBI transaction details when asking for support. This is why screenshots are important.
If your clearance is intended for overseas use, read the NBI clearance color for abroad guide to ensure you apply for the correct document.
What to Do If GCash Payment
Does Not Reflect
If your GCash payment does not reflect, first check whether your wallet balance was deducted. If there was no deduction, the payment may not have pushed through and you can try again. If your balance was deducted, check your GCash transaction history and keep the receipt. Then check your NBI account again after some time.
Try these steps:
If you entered the wrong reference number, refund or correction may be difficult. GCash may ask you to contact the biller because biller approval can be needed for corrections. This is why reviewing the details before payment is the most important step. Never rush the confirm button.
Common Mistakes to Avoid
Most GCash payment problems happen because applicants pay before checking their NBI transaction details. Some enter an old reference number, wrong amount, or wrong biller. Others delete the receipt before checking the NBI account. These simple mistakes can delay the appointment or force the applicant to contact support.
If you are paying for a renewal application, follow the NBI clearance renewal guide to complete the process correctly after payment.
Avoid these mistakes